Thursday, May 31, 2012

Simple Half Flower.

Hello Hello!

Sorry for not updating sooner, but things happen and my computers still not fixed sooo I'm using my phone to update you guys.

I did a quick "Simple Half Flower" and honestly it took all of 30 minutes including drying time. It's really easy and I hope you like it.

So here's all the materials I used:
-Confetti "Last Dance"
-Nail Art CM in white

I used one coat of "Last Dance" instead of using my typical two since it gave really good coverage and it's pretty dark. As always, WAIT FOR IT TO COMPLETELY DRY. Next I used the CM to draw the lines.


Step 1. Draw a curved line at the bottom center
Step 2. Draw a curved line on the opposite side of the first line. It should look like a pointy oval
Step 3. Repeat Step 1 & 2 to the right of the original pointy oval
Step 4. Repeat Step 1 & 2 on the left of the original pointy oval

That's it. I just did the design on my ring and thumb fingers. It's really quick and easy.

Hope it helps!
Stace

Sunday, May 20, 2012

Update.

Hello Hello!

I know I know, I'm already falling behind on my promise of keeping this blog updated at least once a week. For that I'm sorry!

At the moment my computers not working -_- I dropped my computer and the screen won't show up. So I'm waiting for the repairs to be done. Hopefully it'll be soon.

I'll try to post up new tutorials soon, but it might be a little hard. No one else in the family has photoshop for me to use to watermark my pictures. I'll figure it out soon though.

One more final Tuesday and I'll have more time to post on here!

Thanks for your understanding.
Stace

Saturday, May 12, 2012

Kiss Complete Salon Acrylic Kit Review

Hello Hello!

*Quick Update: I purchased this kit at Walgreens for $19.99, but I found the same product at Rite Aid for $17.99.*

So honestly I never thought I'd be sitting here writing a review on any product. I guess I've never thought about it because I haven't tried any product where I felt like "damn I have to let people know about it."
BUT I have found something that I absolutely love and I just have to tell you guys about. I used to do my own acrylic nails, but then I got lazy and I hated how much the acrylic liquid smelled. It used to stink up my whole house even with ALL the windows opened.
This is the product that I bought. "Kiss Complete Salon Acrylic Kit". I bought it at Walgreens for $19.99. It's a little pricy I know, but completely worth it. I've tried multiple at home kits from Sally's Beauty and they all suck and smell.

In Kiss' set it includes the following:
- 24 white tips
- 40 natural nail tips
- 20 sculpture nail forms
- apple fresh acrylic liquid masking formula (2g)
- acrylic liquid (14g)
- acrylic powder (9g)
- acrylic primer (9g)
- nail glue (3g)
- dappen dish
- 6" 2-way nail file
- beveled manicure stick
- professional acrylic brush

It actually includes a lot for just $19.99 in my opinion. I really like their white tips because they're shorter than the typical nail tips like at the salon so it's a little easier to cut and what not. The sizes were a little bigger for me simply because my nail beds are smaller than normal. So I had to file the sides down a little bit.
But I think the best part was the apple fresh acrylic liquid masking formula. I was afraid that the acrylic liquid was going to make my house smell like the other at home kits I've used. I followed their instructions and put the masking formula in and it honestly smelled like apples. Kind of like an apple gum. It wasn't that bad. You couldn't smell the acrylic liquid at all. COMPLETE BONUS! This is the first kit (trust me when I say first, I've tried a lot) that comes with a masking formula.

The kit also comes with a step by step directions on how to apply the acrylic to your nails. It's a little difficult at first. I remember the difficulty I had the first time I did my own. The directions in this kit however, made it so easy to do. If you're a first timer I think you should have no problems what so ever.

Now in almost every single kit I've ever bought, the brush ALWAYS SUCKS! The bristles always come undone and literally by the end of just one use I have to throw the brush away. The brush in this kit is pretty durable and works perfectly. I simply love it.

Seriously this is going to be my new go to kit whenever I need to do my own acrylics. Completely worth the money.

This was my end result(: I'm completely happy with how they turned out.

Hope this helps!
Stace.

Thursday, May 10, 2012

Ninja Nails.

Hello Hello!

Here's another simple easy tutorial. This time it's a Ninja Themed Tutorial! I hope you guys like it. It seriously took all of 30 minutes to do them. It's by far the easiest thing I've done and it's cute. (Well I think so).

Here's all the materials I used. 
- OPI "Natural Nail Base Coat" 
- NYX Girls "Milano" 
- Wet N' Wild "Black Cream" 
- Kiss Nail Art Paint "05"
- Toothpick"

STEP ONE
As always START OFF with a base coat. Again not doing so and painting your nail with colored polish WILL STAIN your nails. Wait for this coat to dry.  
STEP TWO
Paint ONE coat of NYX Girls "Milano". I thought it was a pretty neutral base coat with a shine in it. It's kind of a glittery gold. I used this as my base. Wait for this coat to dry before proceeding onto the next step.


STEP THREE

Take the Kiss Nail Art Paint "05" and draw two lines horizontally somewhat close to each other. It doesn't matter how close or how far the lines are. The only part that matters is the center. It needs to be neat and tidy. Everywhere else doesn't matter. You'll be painting it. Wait for this coat to dry before proceeding onto the next step.

STEP FOUR

Paint the top half of the line with the Kiss Nail Art Paint "05". Repeat the step for the bottom half of the second line.

STEP FIVE
Take the toothpick and dip it into some Wet N' Wild "Black Cream". Put two dots in the center (where the "Milano" is) You're creating the eyes with the toothpick. This is what the finished product will look like.

STEP SIX
Use whatever top coat you want to cover the design so it doesn't chip.

As you can tell I'm a little bit messy with my nail polish. I don't really care if it gets on my skin/cuticle while I'm painting my nails. It's easily fixable.
This is what I do to erase any nail polish on my cuticle.
1. Grab a clean Q-Tip.
2. Pluck one end of the Q-Tip, to the point where there's hardly any cotton on it.
3. Dip it into nail polish remover, turn the Q-Tip around between your fingers to wrap the cotton around the stick and to remove excess remover.
4. Move the Q-Tip SLOWLY to remove the nail polish.
That's all I do.

Hope this helps!
Stace.

Dots.

Hello Hello!

So I recently did this nail design for my sister. It's super simple and it doesn't take long. I'd estimate it took about 45 minutes. This includes the drying time.

Here's all the materials I used.
- OPI "Natural Nail Base Coat"
- LA Colors (I bought this from the Dollar Tree)
- NYC Long Wearing "French White Tip"
- Toothpick

So as always I put at least one coat of base coats. If I have more time I put two layers on. It make it a little shinier afterwards. Always remember to let your nails dry before going on to the next step.

My sister wanted a nude base so she chose the LA Colors nail polish. This is what two coats looks like.  (Sorry it's a little blurry.) Always remember to let your nails dry before doing the next step.

Next I poured a couple of drops of the NYC "French White Tip" onto a piece of paper so I could dip the toothpick into.

Then starting at the top left corner of the nail, place one dot in the corner. Next put 2 dots on either side of the centered dot. Like in an "L" shape. You can curve the "L" or make it squared or follow the curve of your nail. The first layer of dots should look like the one on the right after you're done.

Next you're going to be placing dots above the dots you just completed. The dots don't have to match up. The only part I matched up was the centered dot on the second row. I put the same amount of dots (5) on the top. I spaced them out a little more so it went pass the first line of dots.

This is the final product.

Hope this helps!
Stace.

Wednesday, May 9, 2012

Nail Tips.

Hello Hello!

So I found this "Tips for Nail Care" on fashionshub.blogspot.com and I thought it was really helpful and I actually used and tried some of their tips and it helped. Hopefully it'll help you guys too!


"Tips For Nail Care":
1. To make your nails grow shiner and strong, soak them in almond oil for 5-7 minutes, then duo the nail brush into white vinegar. Rub them with it and this will increase the strength of your nails. (If this doesn't make sense I don't know either. I just copied what was written).

2. Sometimes excessive use of nail paint on nails and food deficiency makes your nail plate yellowish in color. In order to overcome this problem, dip your nails in warm water with some drops of lemon juice and make a mixture and soak your nails in it and rub it with white vinegar.

3. In order to avoid the breakage of a nail, apply a mixture of camouflage powder and lemon juice with a cotton ball on your nails.

4. If you feel pain around your nails then dip your nails in warm water containing peppermint in it. You will get relief from pain when you soak them in it for some minutes.

5. To make your nails look shinier, take two tablespoons of toothpaste and one tablespoon of lemon. Mix them together and make a paste. Now apply this paste on your nails and rub for 10 minutes, after 10 minutes wash them. You will notice a great change in the shine of your nails.

6. If you apply nail polish on your nails every day, try to take a break for two days in a week. Human nails need oxygen so this break will be good for your nail's health.

7. Dry nails get easily cracked. Use castor oil and lemon juice mixture to remove their dryness. This mixture helps keeps the moisture.

"Protection of Cuticle" 
Cuticle is the protective layer around human nails which protect the nails from different germs and dust. Some people remove them as they think this is dead skin. Use castor oil for maintaining the moisture of cuticle after every bath.

Hope this helps!
Stace.

Cherry Blossom Nails.

Hello Hello!

So the first nail tutorial I decided to make/write about was the cherry blossom nail tutorial I used myself for Easter and just recently did on my sister's nails. I thought it was possibly the easiest one to start off with. I hope you like it.

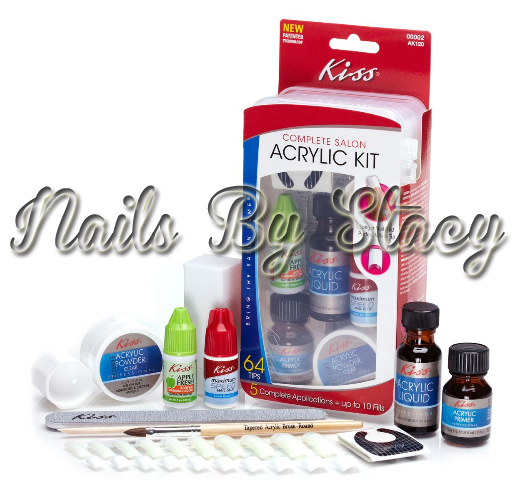
Here's a list as well as a picture of everything I used to do this nail design.
- Sally Hansen Nail Art Pen
- Forever 21 Love and Beauty "Lavender"
- NYC "French White"
- Kiss Nail Art Pen
- Toothpicks
- Not pictured but Dar 2 Wear "Coral"

The very first thing you need to do, and I can't stress this enough is to use a base coat. I know it's kinda like a duh who doesn't use a base coat? But you'd be surprised. A lot of people like to skip this step and don't think it's necessary, but it's completely important. I just bought this base coat and I love it. It doesn't even look like I have any on.

Every time I paint my nails, I always do two coats of whatever color I'm doing only because I feel that if I miss a spot or whatever the first time around I can get it the second time around. So this is two coats of the Forever 21 Love and Beauty "Lavender". Let the nail polish completely dry before putting on another coat. If you keep piling nail polish on without letting it completely dry, it'll take even longer for it to dry.

Next I took my Kiss Nail Art Pen in silver and painted one corner of the nail. You can make it as big or as little as you want. You can even skip this step if you prefer. The finished product looks like it does on the right. You need to wait for the glitter to completely dry because if you try to draw the lines (branches) it'll smear and drag the glitter. Again you can skip this step if you prefer.

So after the glitter dries, I took my Sally Hansen Nail Art Pen and drew random lines around the nail. It doesn't have to be perfect. I drew a line on the left side going straight up then drew branches extending from the original line. Continue to draw lines wherever you feel like putting it.You're finished product should look like the one on the left. Let the lines dry! If you don't when you place the dots its going to smear.


I placed some white nail polish onto a piece of paper so I can dip my toothpick easily into it. With the white nail polish on the toothpick I drew 5 random dots in a circle to create a flower. You can put the flowers wherever you want to place them. This is where I placed mine.

After the white dries, don't forget the center of the flower. I took my Dar 2 Wear in "Coral" and placed a center. This is what my finished product looked like.

You can use whatever colors you prefer to do this nail design. There's no limits on it. It's simple and easy to start off with. The finished product on my sister's nails.


Hope this tutorial helped you.
Have a great week!
Stace.


Friday, May 4, 2012

Tools that will help you get started...

Hello Hello!

To get started with my blog I decided to have an entry about the nail tools I constantly use on a constant basis. As corny as it sounds I really couldn't have done some of the designs I've done without them.

The first is the Sally Hansen Nail Art Pen. I have it in black and white. I bought both of them at CVS for $7.99 each. The black one will be worth your while the white one sucks. It barely shows and you have to go over it about 3-4 times. But this is what I use to draw most of my lines and dots. It's simple and it's like using a pen. This is what the pen looks like in the box, what it looks like without the box, and the actual tip of the pen. I think it's worth the money for a beginner. The lines come out straight forward. You can make the lines thick or thin. Sorry the lines kinda smeared into the paper I drew the lines in ): But that's what they look like.
The second that I'm sure you've seen a lot of is the dotting tool. It's easy and makes perfect circles. HOWEVER, they're expensive as hell. Not worth the money if you ask me. You can make your own dotting tools with things that you have around the house. You can make dotting tools out of old pens (without any ink), toothpicks (my personal preference), bobby pins, and pins stuck into erasers.
With the toothpicks what I do is try to get the tip shaped like a bobby pin tip end. I just roll the toothpick around in some nail polish make it round and let it dry. It'll then create the dots you're looking for. If you want big dots, continuously roll the toothpick into the nail polish until you get your desired circle.
The last tool I use a lot also is the Kiss Nail Art Paint I usually use this to make lines as well. It's a little difficult to use in my opinion compared the Sally Hansen Nail Art Pen since you need to have a steady hand and do the stroke in one motion. It's usually cause of this brush that I end up having to redo my nails.

Well that's all the nail tools I use on a daily basis.


Hope that helps!
Stace.

the beginning...

Hello Hello!

So most people have been asking me how I do my nails, what I use, and if I make tutorials. So cause everyone keeps asking me, I decided to make a blog instead of doing video tutorials. Before you ask why not do video tutorials, it's cause I can't seem to find my camera at the moment and I didn't like the way my iPhone did the video. And it's because I make so many different mistakes with my nails, that it would take too long with having to stop and restart the video to correct my mistakes.

If you think that my nails come out perfectly on the first try, you're honestly mistaken. I'm anal that I'll redo the same finger like 2-4 times before it comes out perfectly and the way that I want them to.

So this is the beginning of my first official time blogging. I hope you guys can bear with me and hopefully I make things simple enough for you to be able to do it on your own. I'll be posting what materials I used, step by step instructions, and the finished product. You never have to use the same colors or brand as I do. Use whatever colors you have or things that are around you. Be creative!

I'll also be posting up random blogs about tools that you can make or an update with colors I've recently bought etc.

My ideal goal is to go through all my old Instagram photos and make tutorials on those nails and expand from there. I'm hoping that I'll be able to post on here at least once a week if not more often.

Well yeah. That's about it.

If you guys have any suggestions or specific tutorials done, please comment below and let me know. Or just text me or something.

Hope you guys have a great week.
stace.